Trigger a pipeline using a webhook
You have statically rendered your web app and want to trigger your build pipeline whenever there is any publish/unpublish action in the Content Management System (CMS) using a webhook. It will be more than just triggering a pipeline using a webhook. We will require the following things before we move on to create our automation workflow.
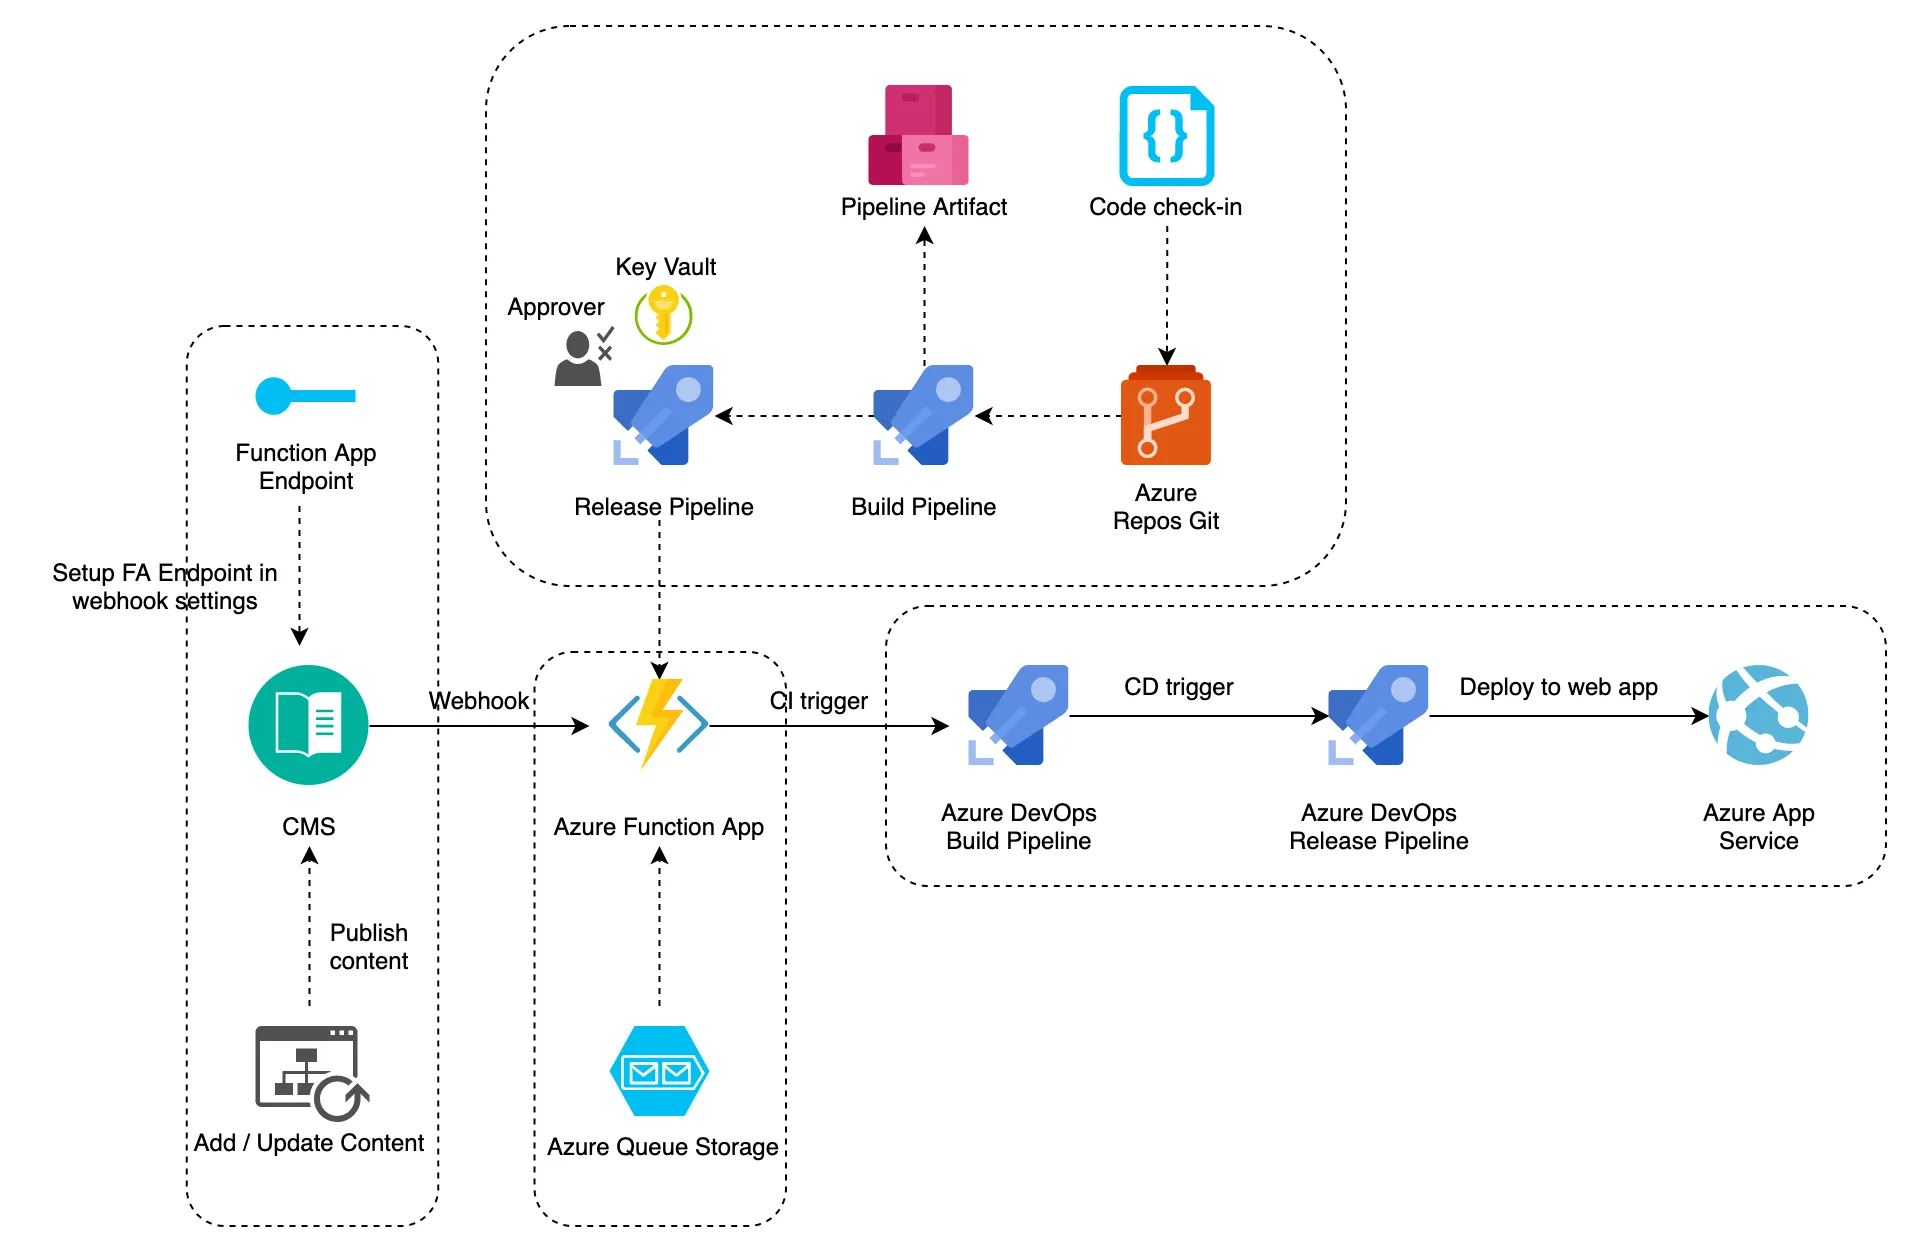
1. CMS (we will be using Contentful)
2. A serverless function (Azure Function Apps/ Google Cloud Functions / AWS lambda)
3. DevOps pipeline to be triggered.
4. CI tool REST API token to securely trigger the build pipeline (we’ll be using Personal Access Token of Azure DevOps)
5. Code Repository
6. Queue storage (we’ll be using Azure Queue Storage)
7. Target server (App service/EC2 etc. to view published content)
1. Create a Function App
Go to Azure portal → Custom Deployment →Load a GitHub quickstart template or load your own custom template and parameter files
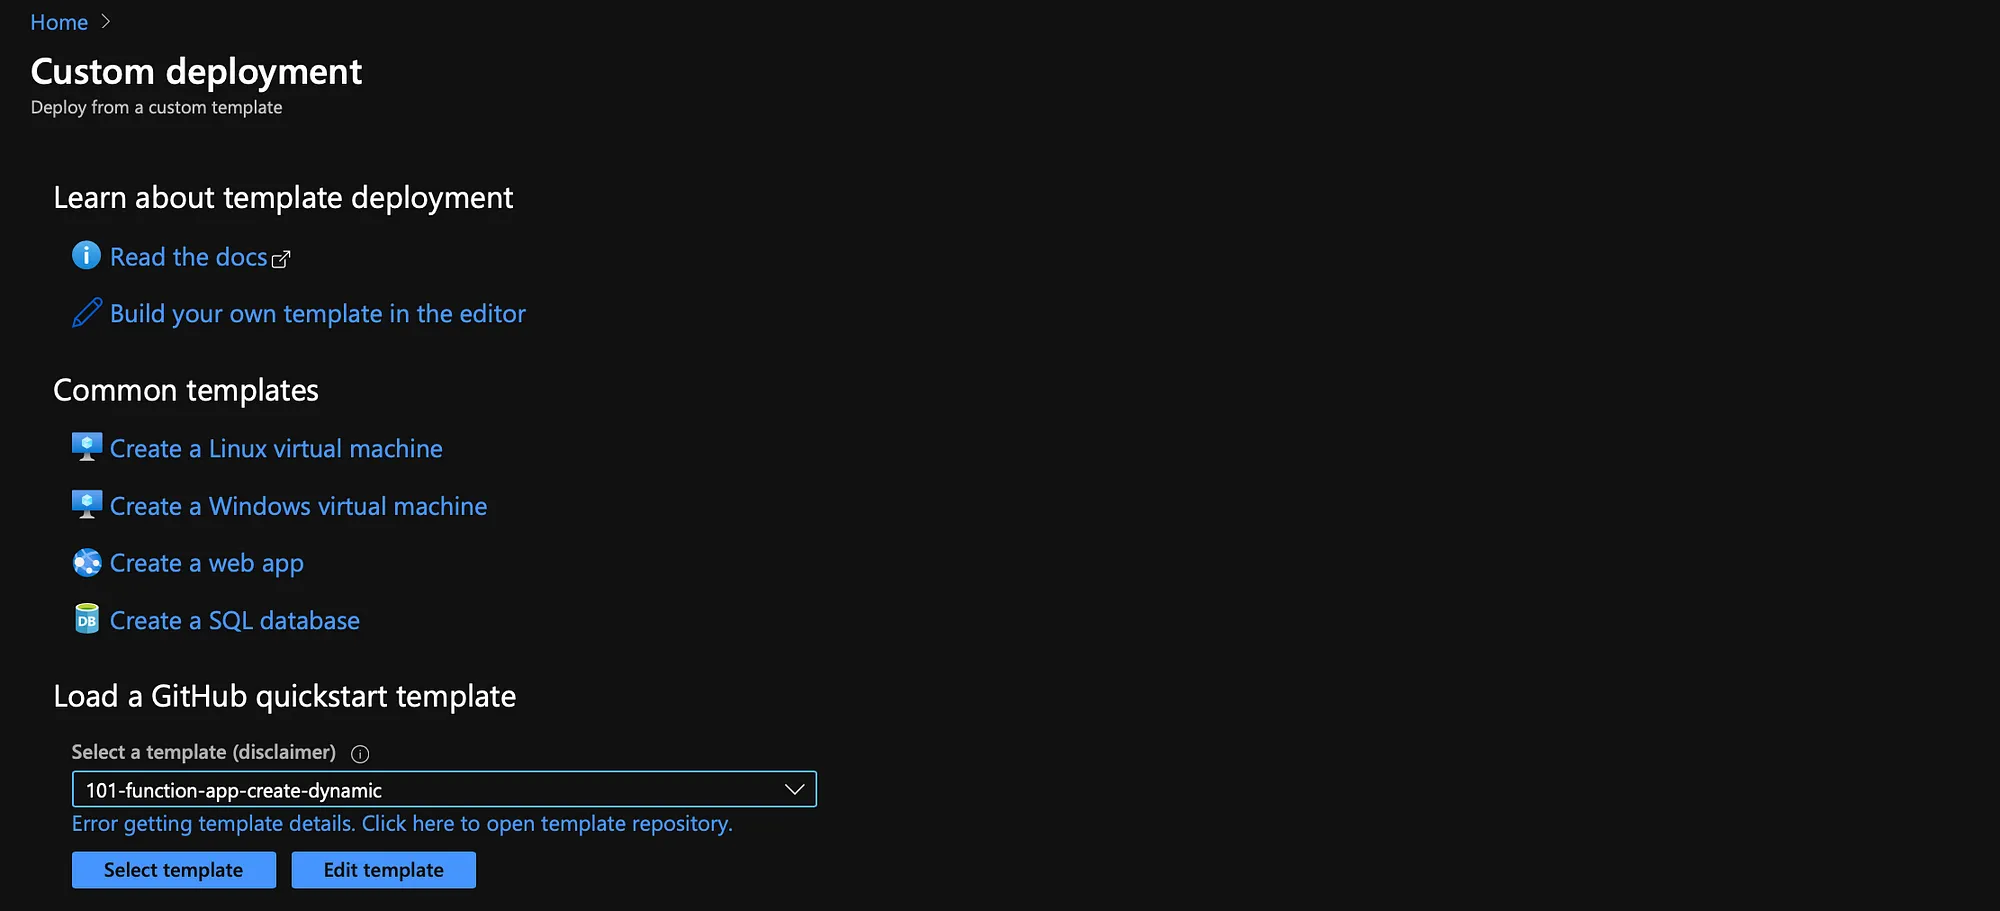
Alternatively, we can create a function app and a storage account from the portal.
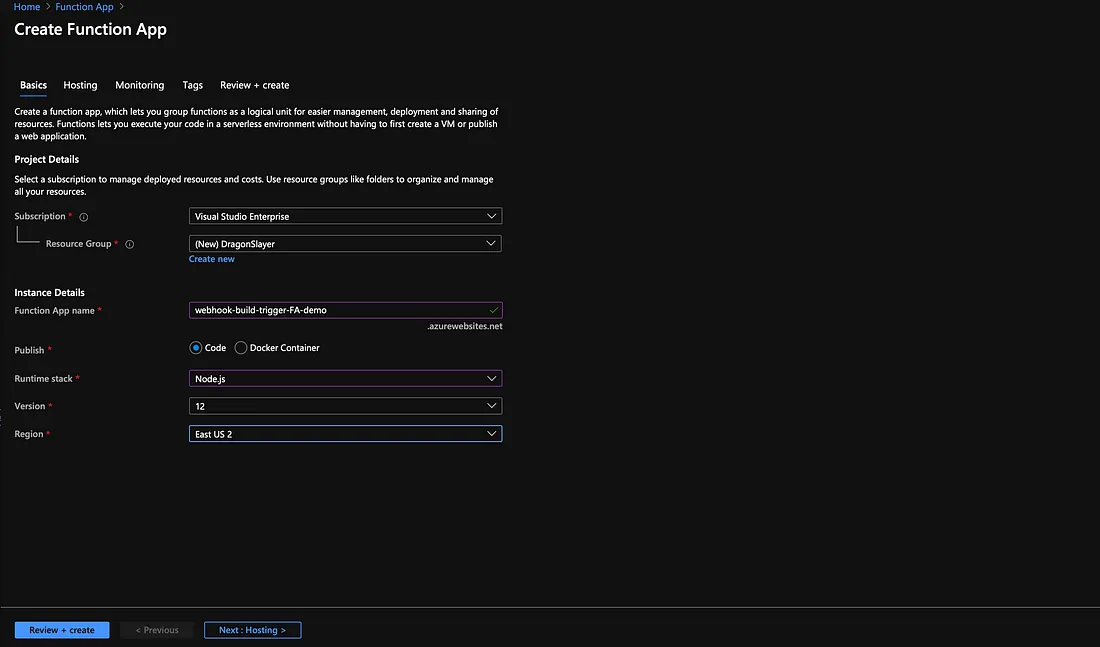
Go to Azure Portal →Create Function App →Fill the Instance details → Select runtime as required. We’ll be using Node.Js as runtime stack→Next: Hosting
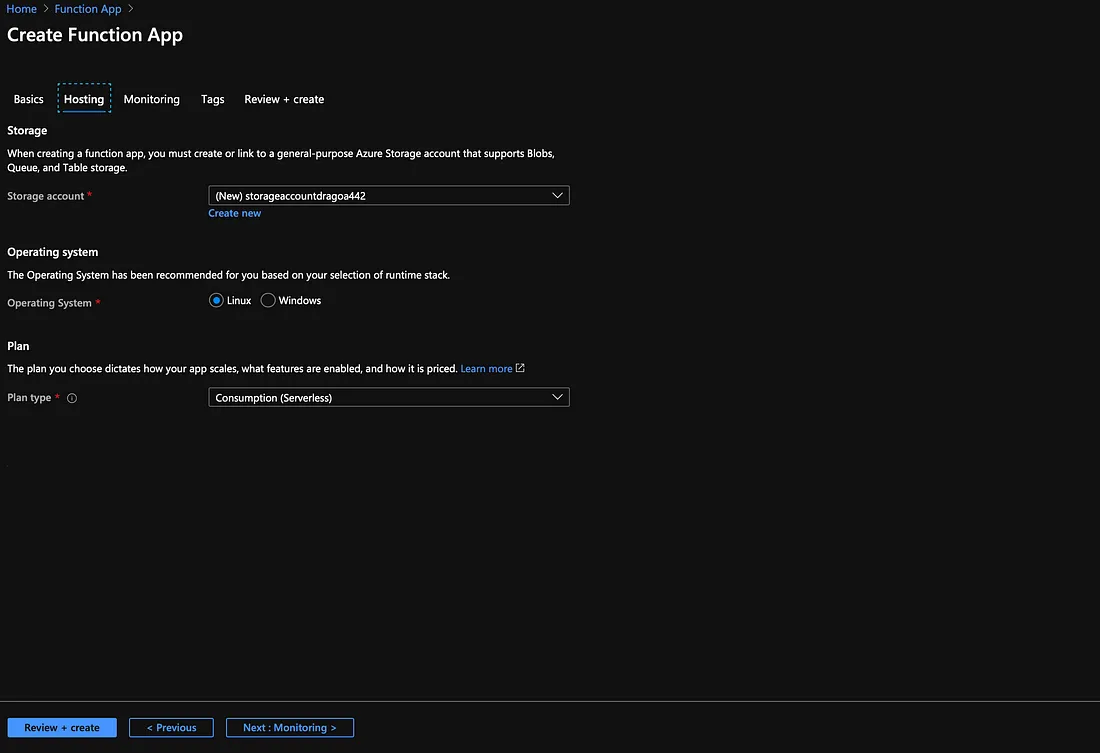
Create a new storage account/use an existing one → Select plan type as consumption/premium depending on the environment/usage. This storage account will be used for storing function app files. This is because Functions relies on Azure Storage for operations such as managing triggers and logging function executions. The storage account needs to have a queue and file storage services. Only the Blob storage account cannot be used with Azure Functions.
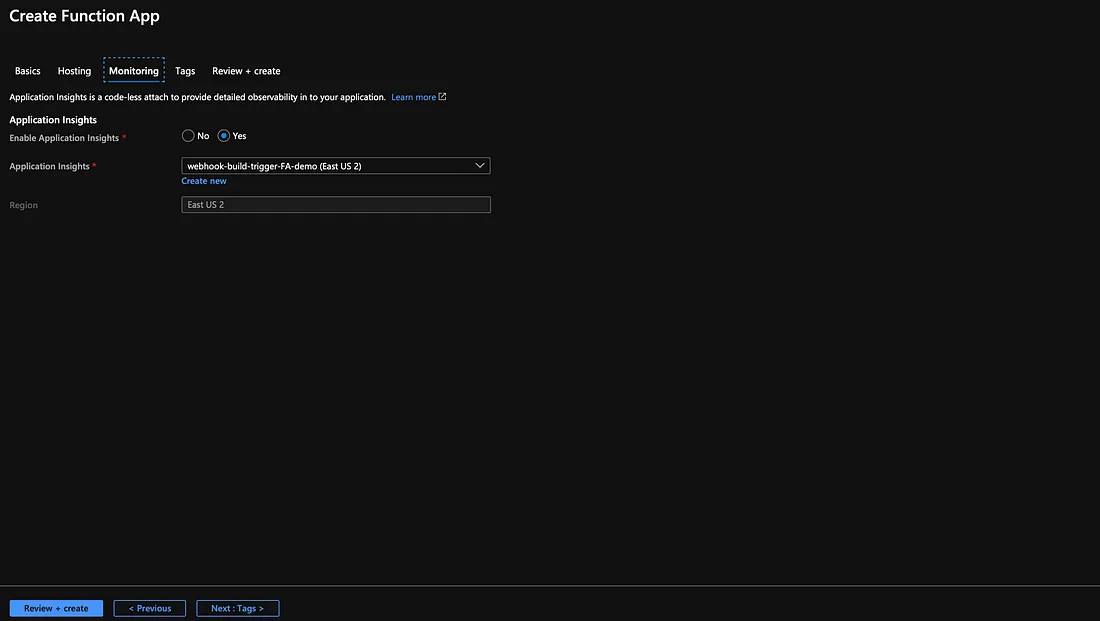
Go to Monitoring → Enable Application Insights if needed → Add Tags like Resource creation date, TA, owner, etc. → Review+Create
2. Add a function in the Function App
We’ll be storing our Function App code in Azure Repos Git and use Azure Pipelines to deploy our code to the created Function App. You can directly write your code in the Function App editor (not recommended). The folder structure in the Azure Repos Git branch is shown below. The folder structure will be different for different runtime stack.
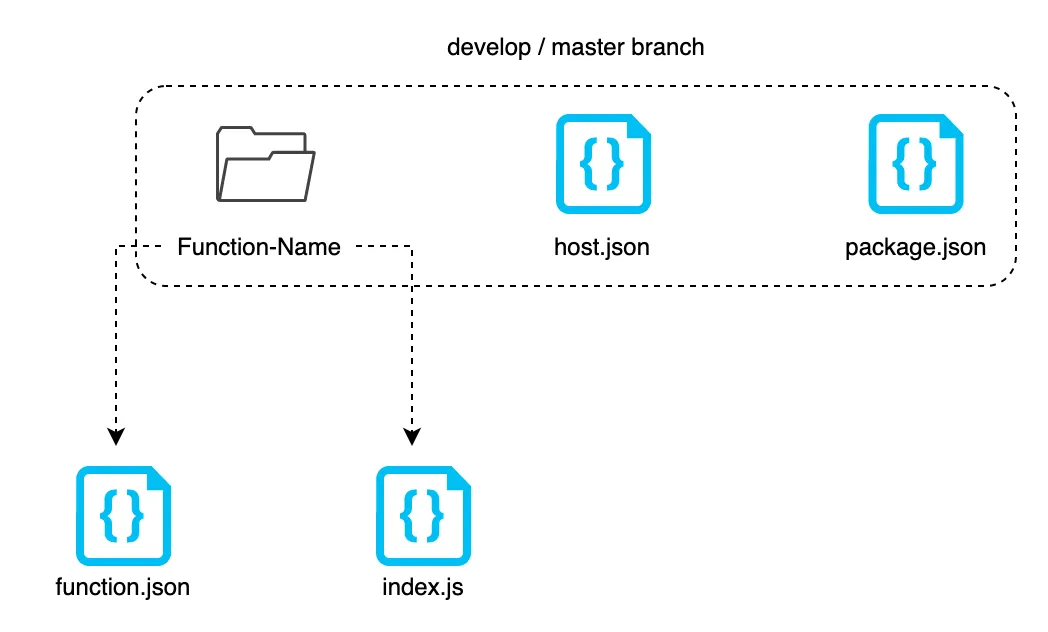
1. package.json will contain dependencies and dev dependencies like Axios module or azure-storage-module. This file also holds various metadata relevant to the project like version, description, etc.
2. index.js will contain our code.
3. host.json metadata file contains global configuration options that affect all functions for a function app. Configurations in host.json related to bindings are applied equally to each function in the function app.
4. In function.json, you can use expressions that resolve to values from various sources. Most expressions are identified by wrapping them in curly braces. For example, in a queue trigger function, {queueTrigger} resolves to the queue message text. If the path property for a blob output binding is container/{queueTrigger} and the function is triggered by a queue message HelloWorld, a blob named HelloWorld is created.
Find the sample files below.
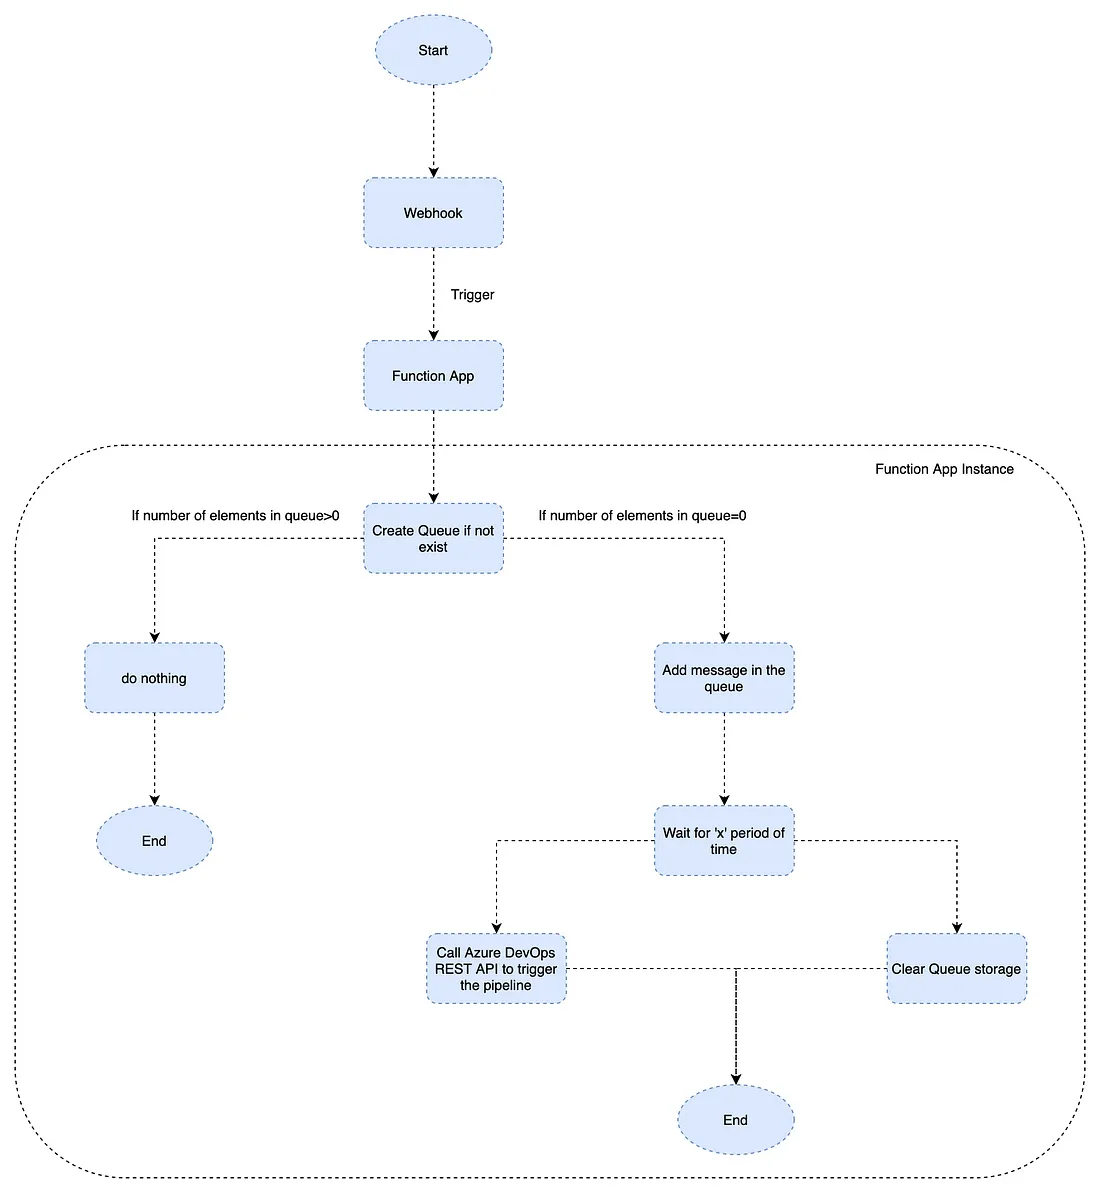
3. Deploy Function App code using Azure DevOps pipelines
Once you are ready with the function code, it can be deployed to Azure Functions using Azure DevOps CI/CD pipelines. Check out this article on how to deploy Node.Js application using Azure DevOps pipelines. All the steps will be similar except 2.6 where we have to select Function App as App Service type. Keep all secrets like storage account key and Personal Access Token in Keyvault for secure access.
4. CMS webhook settings
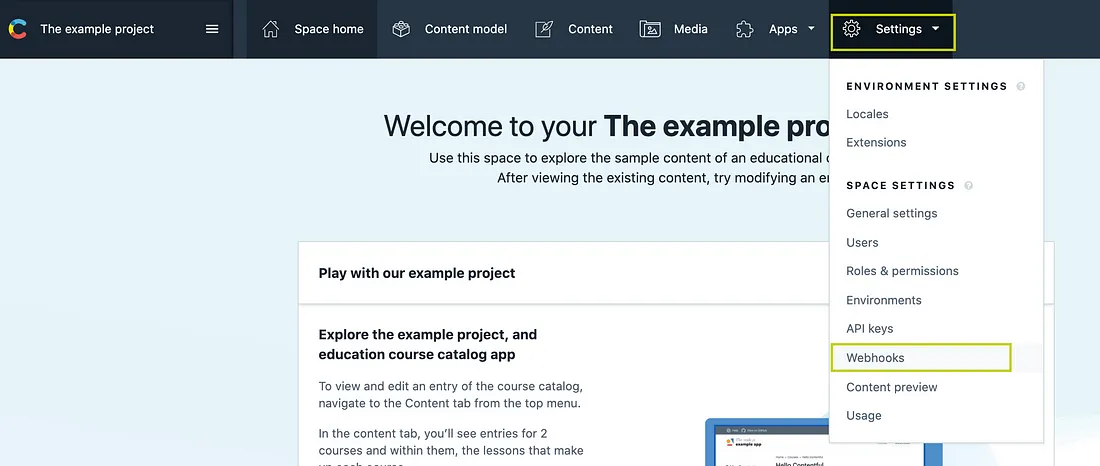
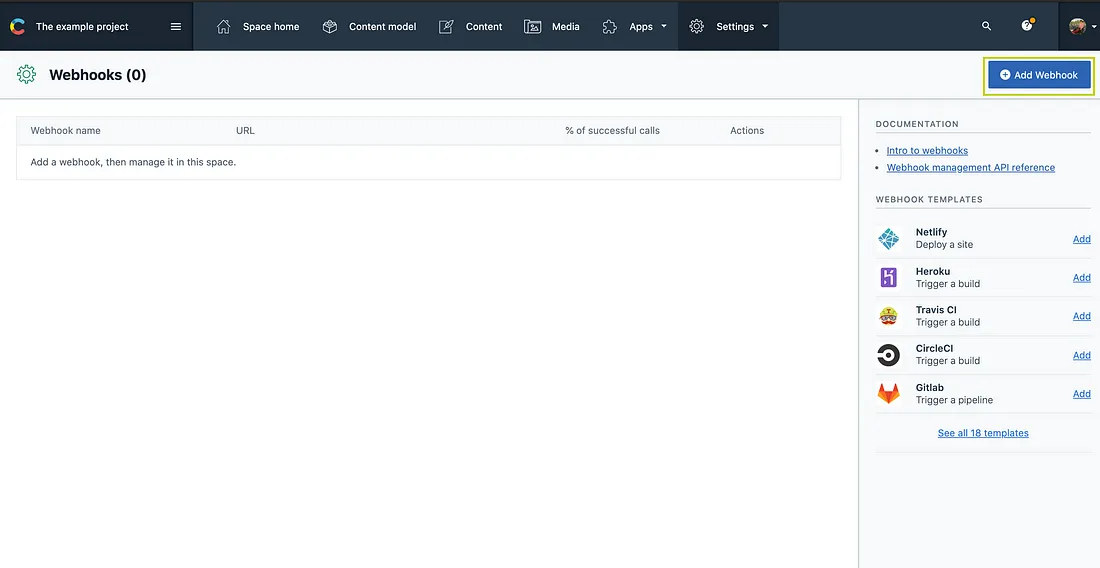
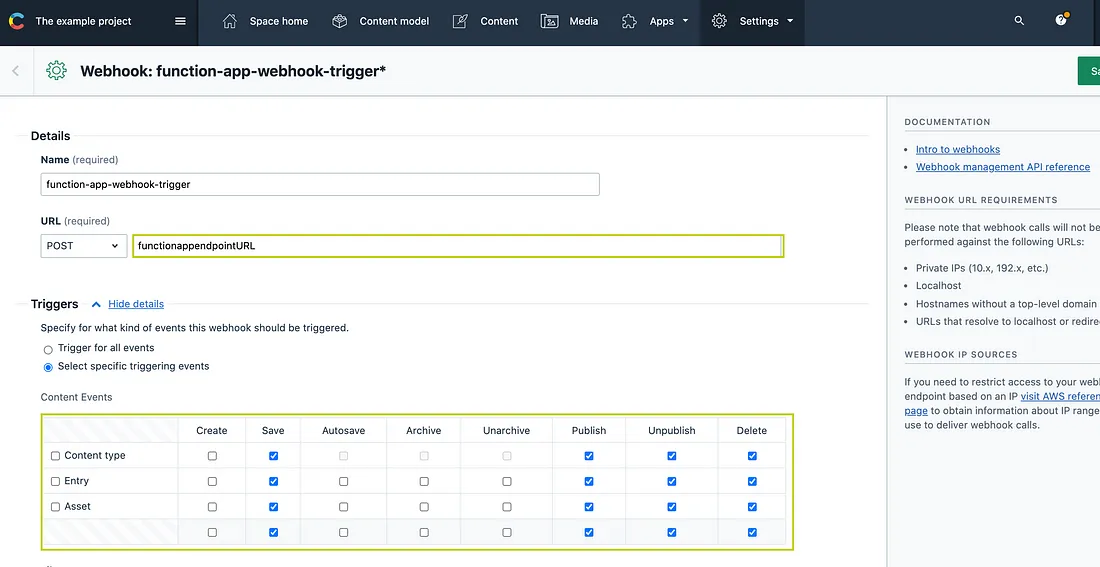
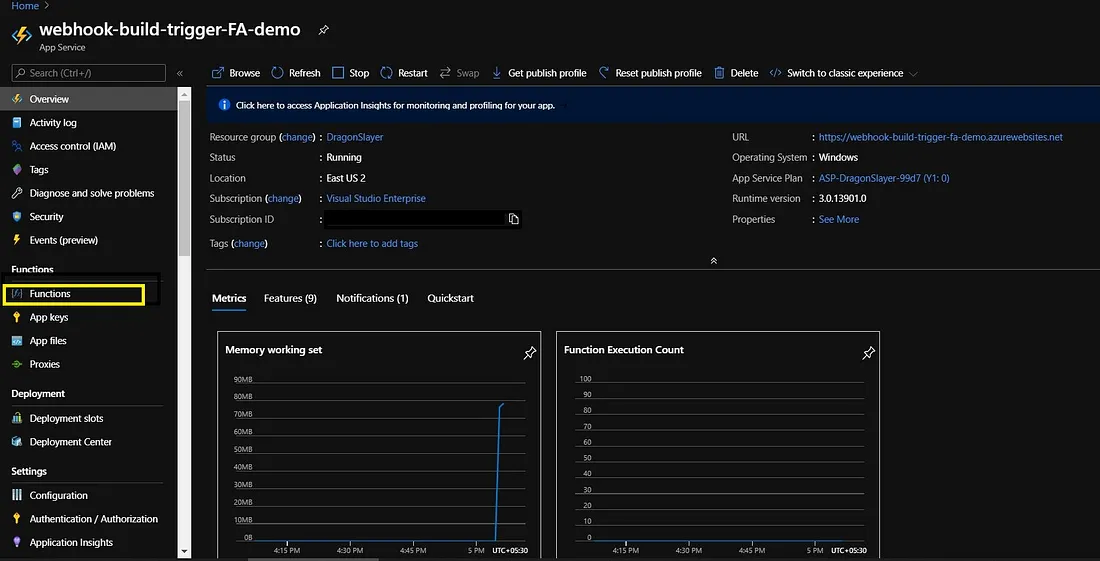
When we are ready with the function app, let’s add the function app endpoint URL in the contentful webhook settings page and get Function endpoint URL
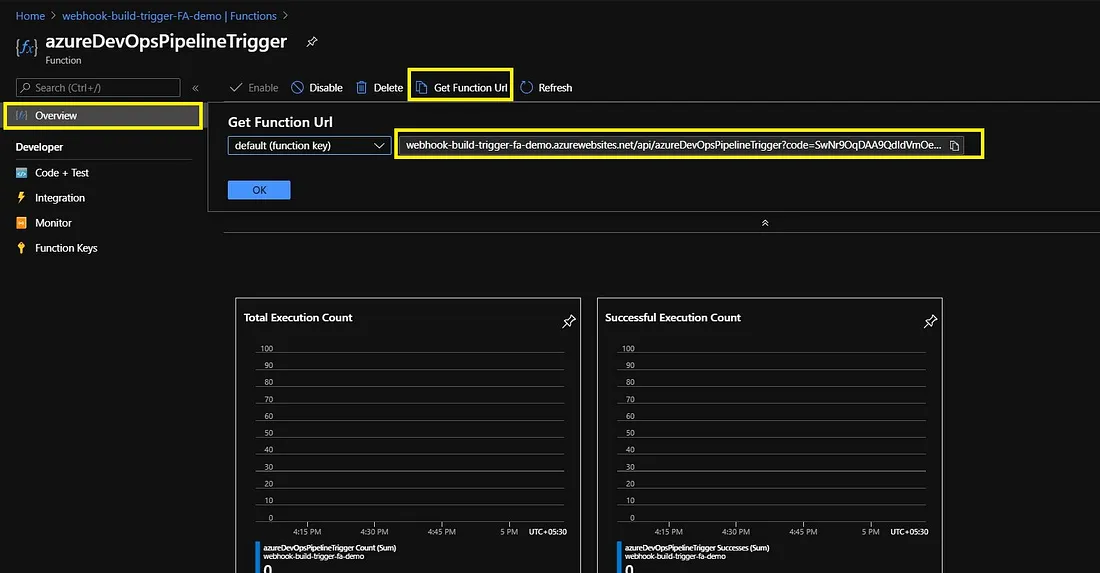
Set up webhook settings in Contentful.
