AUTOMATE AZURE DEVOPS WORK ITEM UPDATES WITH AZURE FUNCTIONS AND THE AZURE DEVOPS API
OBJECTIVE.. I use Azure DevOps Boards for agile project management, allowing me to plan, track, and discuss automation and DevOps tasks. I also create reporting dashboards from the data within the work items. One such metric I report on is how much time we save when implementing a new automation. To do this, I have a field called “Estimated Manual Time (min)” and “Annual Occurrences“. The first field is how long it takes someone to do the task manual right now, and the second field is how many times per year this certain task is done. The last field is “Time Saved Annually (hours),” which takes the first field, multiply it by the second field, and then divides that number by 60. In this article, I will show you how I automated the “Time Saved Annually (hours)” value whenever a new work item is created or the first or second field’s value changes.
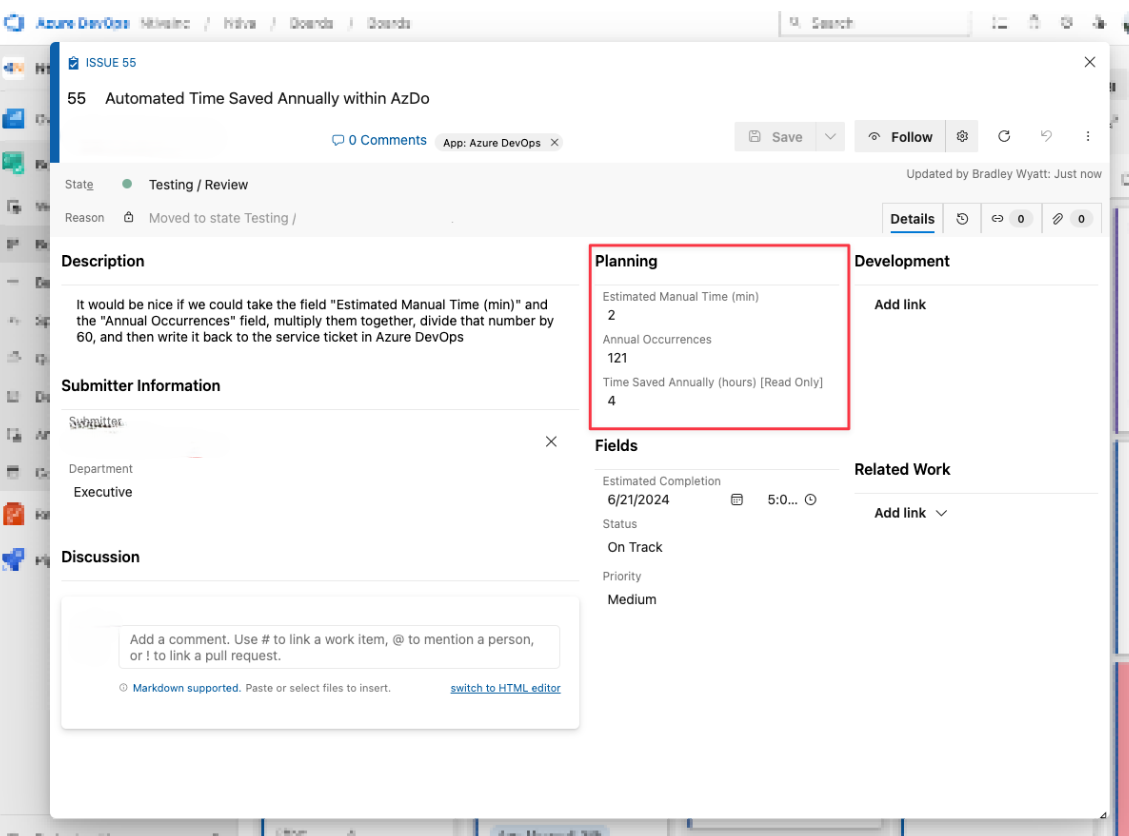
GET A PERSONAL ACCESS TOKEN FROM AZURE DEVOPS
1) First, we must get a personal access token (PAT) from Azure DevOps (AzDo) to use it to interact with the API.
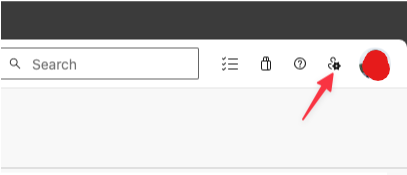
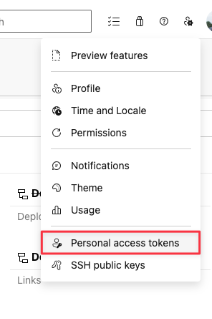
2) From there, click “Personal Access Tokens.”.
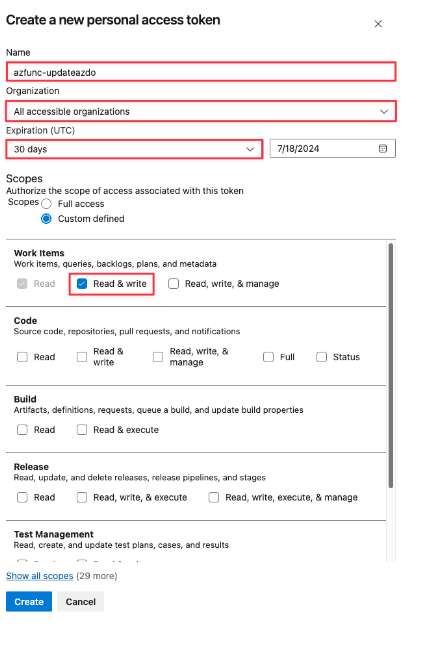
3) Give your PAT a name, which organization it will have access to, and an expiration. For permissions, give it Read & Write for work items.
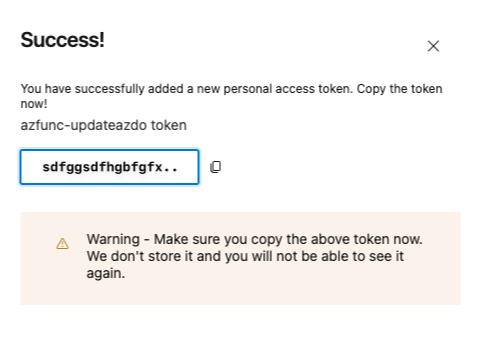
4) Take note of the PAT and copy it for later.
SETTING UP WORK ITEM FIELDS
In my example, I created two custom fields:
1. Estimated Manual Time (min)
2. Annual Occurrences
Task Details
The automation will retrieve both field values, multiply them, and divide by 60 to get how much time is saved annually in hours. To do this, I need to get the field name. The field name (don’t confuse the field name and the label name) will most likely be “custom.[fieldnamenospace]” If I go to my Project Properties > Settings > Processes, I can view the name of each field. The example below shows the Estimated Manual Time (min) field name:
The latest LTS Node version is already installed on the agent and is managed by Microsoft. If you are using a specific version of Node in your project then use this task to specify the exact version you want to use.
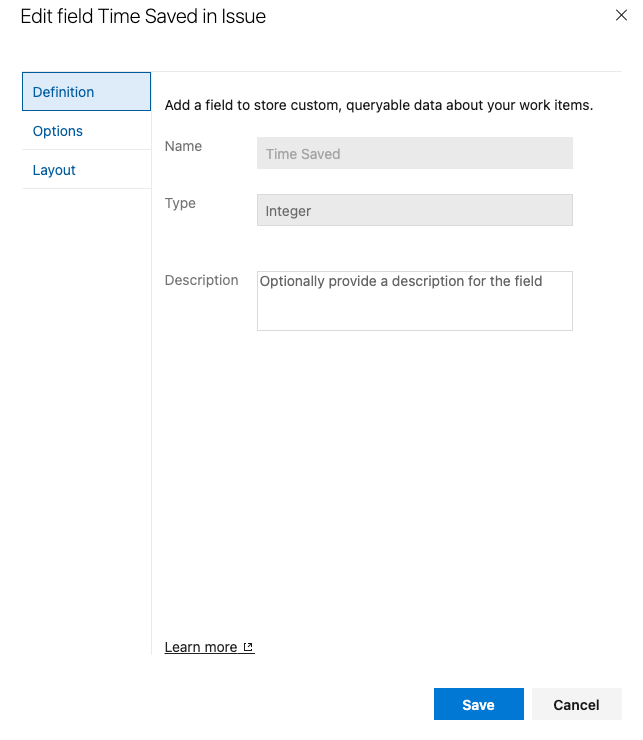
The label, however, is Estimated Manual Time (min)
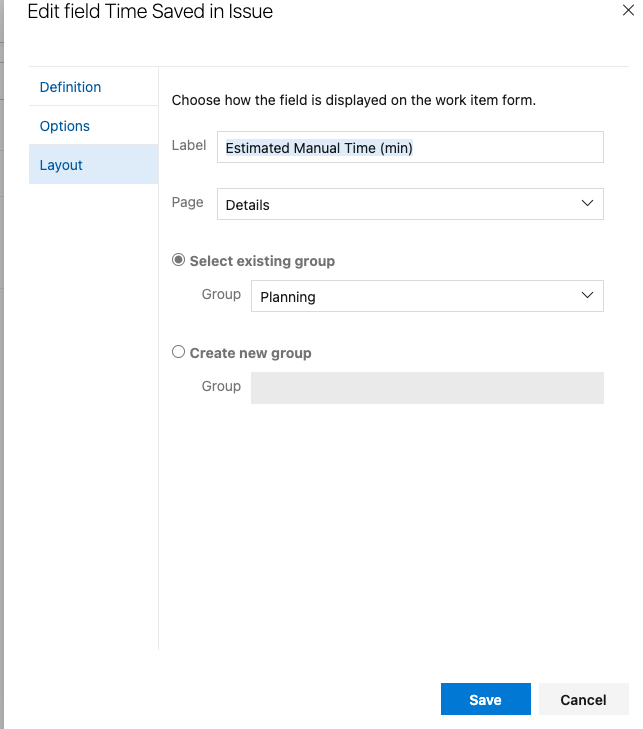
So, in my case, my field names are:
1. Custom.TimeSavedAnually
2. Custom.TimeSaved
3. Custom.AnnualOcurrences
Another way to get the field name is to use something like Postman and the PAT you got earlier and view the properties of a work item where you have those fields present. The GET URL would be:
https://dev.azure.com/{{organization}}/{{project}}/_apis/wit/workitems/{{workitemID}}?api-version=7.1-preview.3
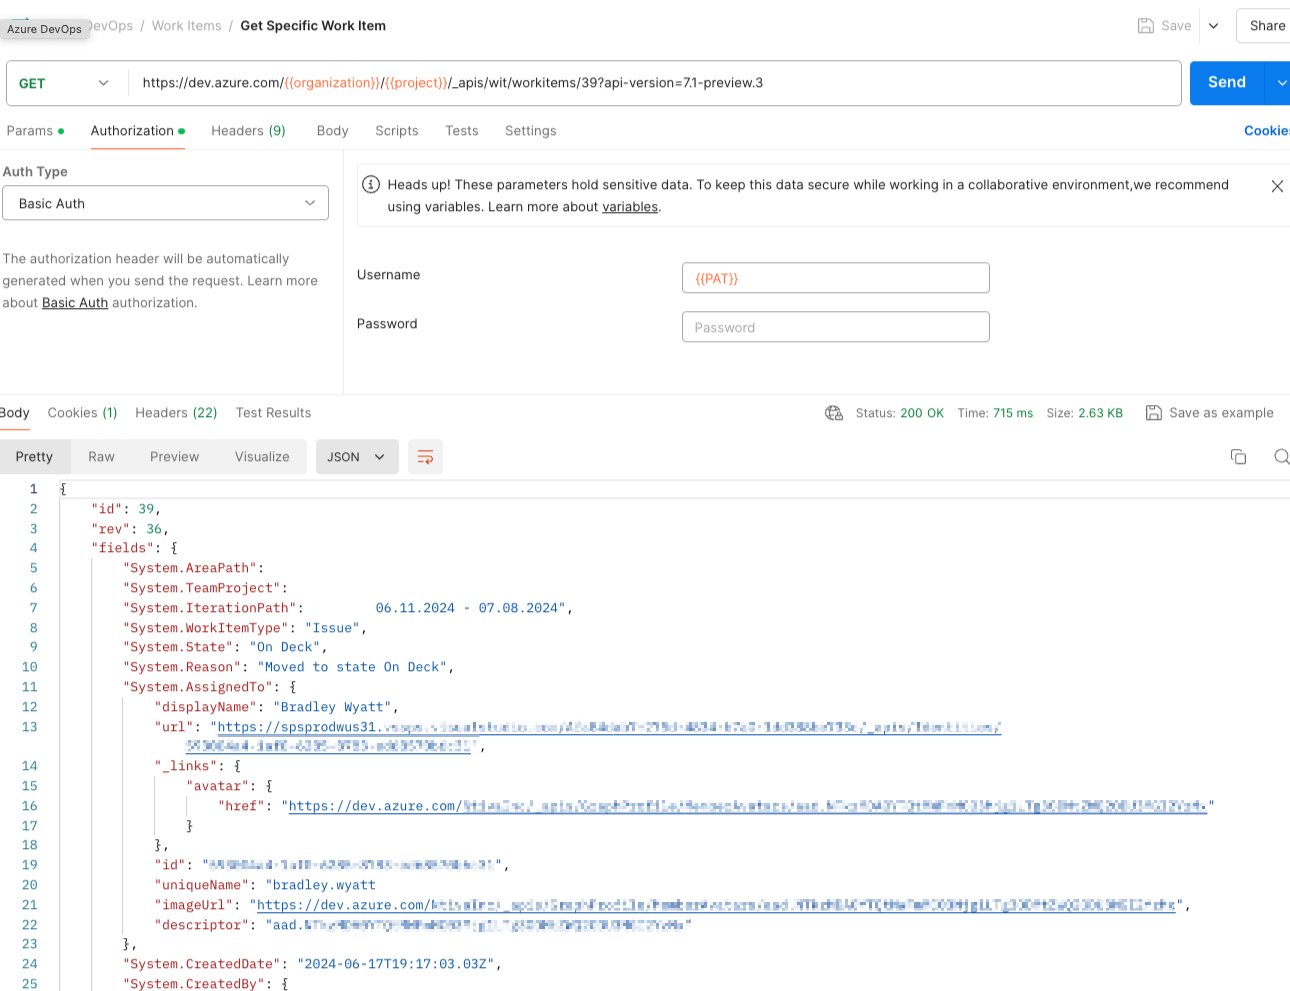
(replace the organization, project, and workitemID)
The API uses basic authentication, so put your PAT encoded in Base64 as the username.
NOTE: Make the two fields mandatory so you can ensure they always contain values.
CREATE AN AZURE FUNCTION
CREATE A NEW POWERSHELL FUNCTION
Next, we need to create an Azure Function that will be used to intercept incoming webhooks from Azure DevOps and then, in turn, interact with the Azure DevOps API.
1) I chose a Consumption Azure Function. For Runtime, select PowerShell Core and whatever version is the latest.

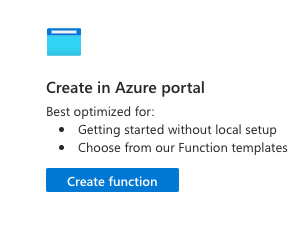
2. Next, we need to create the actual function:
3. Select HTTP trigger
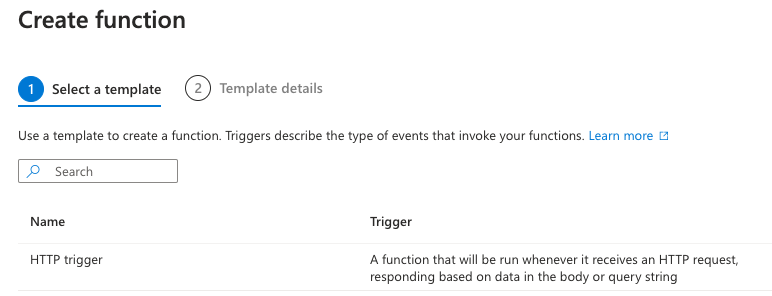
4. Give your function a name, and for authorization, select Function; this means the function requires the function key to use.

EDIT FUNCTION CODE
Edit your new function and replace the code with the code below:
Note: You will need to change the field names to match yours. For now, leave the $PAT as it is.
ENVIRONMENT VARIABLES
In your Azure Function, go under Settings to Environment variables
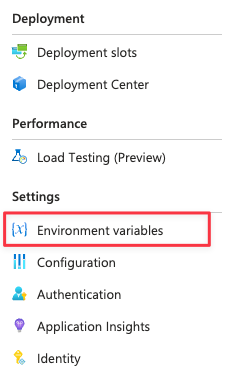
Create a new one called PAT, and the value should be the Azure DevOps Personal Access Token that we got above (not encoded).

Note: For additional security, consider linking an Azure Key Vault instead
GET FUNCTION URL
Return to your Azure Function under Code + Test, click Get Function URL, and copy the URL for the default. Copy the URL for later.

CREATE AZURE DEVOPS SERVICE HOOK
Lastly, we must create a Service Hook with our Azure DevOps project. This will send a webhook to our Azure Function if a new work item is created or a specific field(s) is updated.
1. In Azure DevOps, go to your Project Settings
2. Under General, click Service Hooks
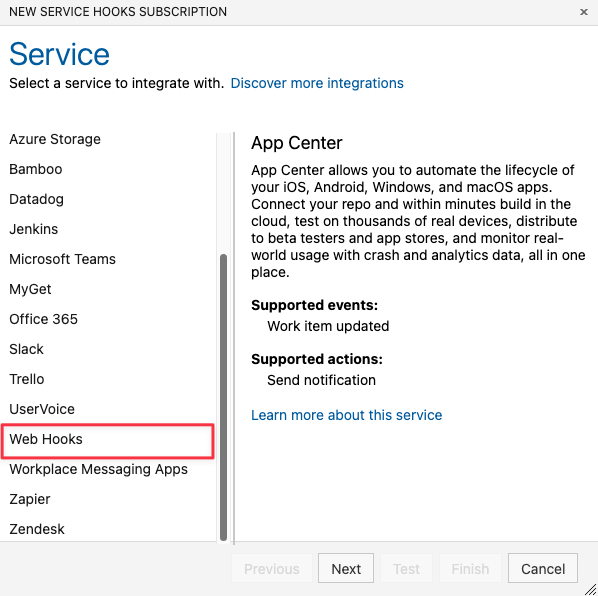
3. Create a new one and select Web Hooks
4. For the trigger, select Work Item Created
5. For the action, paste the URL for your Azure Function
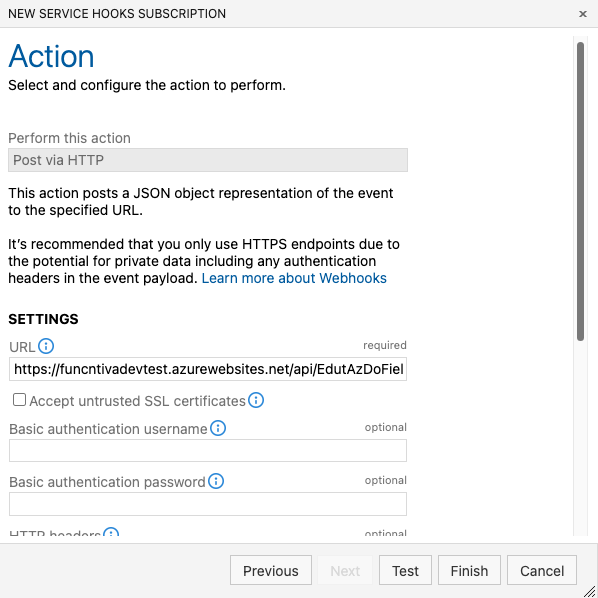
I would not click on the Test button because we are creating custom fields, and the test data will not contain that. Instead, press Finish and then create a new work item. You can see it performed in the Azure Function’s Logs window.

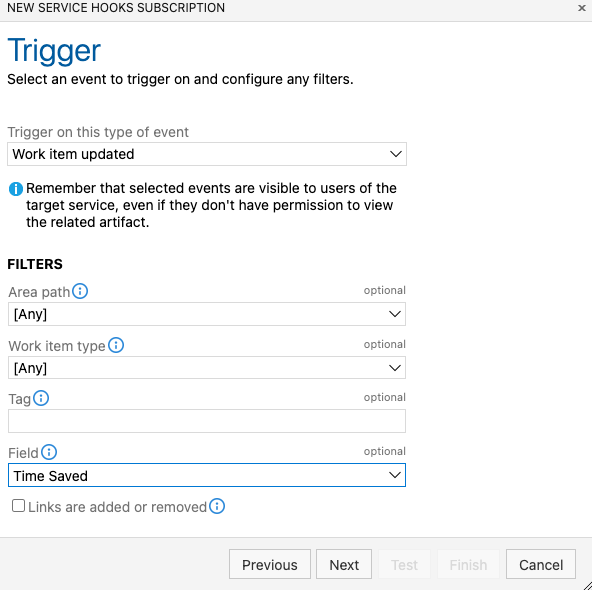
7. Repeat the same steps as above, but instead of Work Item Created, select Work Item Updated and select the field to monitor. In my instance, I chose “Time Saved,” which is the Estimated Manual Time (min) field.
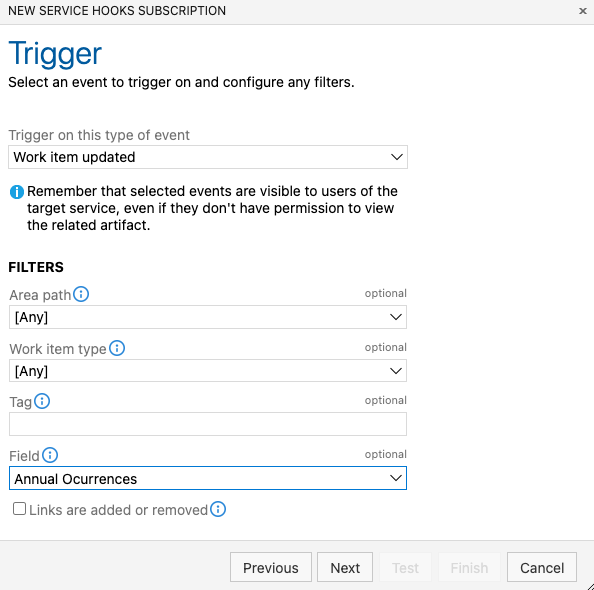
Finally, I created one for the field of annual occurrences.
Now I can see all three of my web-hooks.

FINAL THOUGHTS
I now have automated figuring out how many hours are saved on a certain work item by performing math operations on two fields within the work item itself. The different service hooks allow anyone to edit the fields anytime because the Azure Function will perform its operations on the field change.
This may not be the largest time saver in the world, but as you scale and add more work items to your organization, it begins to show its return. It will also allow you to always have the correct numbers to report if they are changed.
Using this automation logic, you can take it a step further and begin to automate other aspects of work items, bringing in data from outside Azure DevOps and aligning it with other external services.
Contact
Etecnest as your trusted IT and Cloud Service Provider. We are dedicated to delivering innovative solutions that propel your business into the digital future. Whether you are seeking robust IT services, comprehensive cloud solutions, or a tailored combination of both, we are here to meet your unique needs.
Our Address
J P Nagar 509 Area Pune 411032
Email Us
info@etecnest.com
Call Us
+91 7875092767
